Understand the Legal Implications of DIY Tiling Wet Areas
When building or renovating, homeowners usually choose to do some of the work themselves as a way of saving money for other items or projects. While some DIY projects are pretty simple and straightforward, others, like tiling and waterproofing wet areas, can be very complicated, dangerous, or even illegal.
Waterproofing is Important
While tiling any area seems like a simple enough job, when it comes to bathroom floors, shower enclosures, and other wet areas like laundry rooms, tiling alone is not enough to protect the structure of your property from water damage. So, you need to waterproof and wet-seal walls, floors and seams where water is likely to gather.
In Queensland and New South Wales, waterproofing and wet sealing can only be done by licensed professionals; so if you live in one of those states, put your DIY tools aside and hire a professional.
It’s important to note that even in other states if you choose to do the waterproofing yourself, you will still need to ensure it is done to the Australian Standard AS3740-2010 – ‘Waterproofing of domestic wet areas’ to pass a building inspection. We would still recommend homeowners hire licensed professionals to complete the job, as this will ensure issues don’t arise down the line – be it with home insurance or water damage.
How Waterproofing is Done
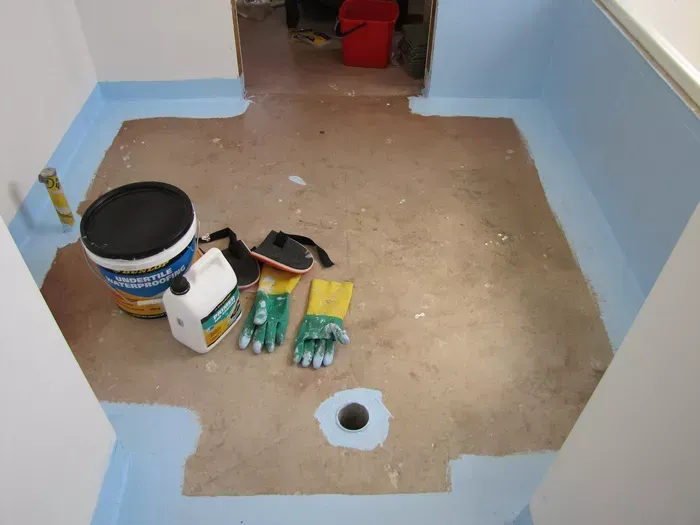
The process of waterproofing involves applying a primer to the surface to be waterproofed and a liquid water based polyurethane membrane is applied to relevant areas. This is painted across walls and floors using a paint brush or paint roller, and usually, two to three coats are applied, one rolled horizontally and the second one vertically. Edges and corners need to be sealed with neutral cure silicon and covered with polyester fabric bandages so to create a bond breaker. Tile Wizards also makes the job easier by selling a fabric bandage with a polyurethane bond breaker already inserted in the bandage.
The Tiling Process
Once your room has been waterproofed and left to cure for 24 hours, the tiling process begins. While some people prefer to have professionals take care of tile installation, it is quite a DIY friendly process. It helps if you’ve done it before, however, even with no prior experience, if you are patient, careful, and follow the below instructions, you can still achieve great results.
- Tile selection. Usually, different styles of tiles are used for floor and walls, depending on their slip resistance.
- Measuring a room is very important and must be done accurately, length x width will give you M2 then add 10% which will allow for wastage when cutting in tiles.
- Pattern selection – deciding where you would like to put your feature wall/tile or feature strip. Choose a wall that can be seen from the entry to the room which will give the area wow factor
- Set out is the most important part of creating a great looking bathroom as you want to make sure that you try to get over half a tile, as larger cuts are more aesthetically pleasing to a room’s overall appearance. Start by measuring each wall/floor horizontally and vertically and finding the centre of the wall/floor to make sure that the cuts are even on both sides of the wall/floor
- If you don’t have a lot of experience with tile installation, a ‘dry run’ is highly recommended. This means you lay your floor tiles before applying any adhesive just to make sure you like the pattern, and that you have enough tiles to complete the job. – If this is your first time, make sure you buy more tiles than you need, to allow some room for mistakes. Wastage allowance is normally 10% so if you get 15% extra then you will have a few tiles spare which always come in handy if you make changes in the future
- Tiles are cut at the internal and external corners of a room.
- Before applying waterproofing or tile adhesive a suitable primer must be used
- A thin set mortar (tile adhesive) tiles over 30×30 a 12mm notch trowel is recommended and then applied to the surface they’re going onto, and the tiles are pushed into the adhesive with a slight twist action – use spacers to leave gaps for the grout and silicon must be used in internal corners allowing for movement.
- Tiles are left for 24hrs to ‘set’ – this is particularly important for floor tiles, which need to take a lot more weight.
- Spacers between the tiles are removed, and grouting is applied to properly fill the gaps between the tiles.
- The remaining grout is cleaned off by using a sponge and water, and the grout is left to set.
- Once the grout has set you will need to dust off the tiles with a clean dry white rag to remove any grout residue that is left on the surface of the tile.
- If you are using a light coloured grout or you want your grout joints to remain the same colour for years to come Tile Wizards suggest you use a grout sealer
For more information about tile installation, visit any of our Tile Wizards stores and talk to one of our staff. While there, you can also see our collection of tile products up close.
Visit one of our stores across Australia, in and around:
- Sunshine Coast QLD (Tile Wizards in Bokarina)
- Coffs Harbour NSW (Tile Wizards in Coffs Harbour)
- Adelaide SA (Tile Wizards in Lonsdale, Para Hills West, and Richmond)
- Brisbane QLD (Tile Wizards in Springwood)
YOU MIGHT ALSO LIKE TO READ:
Taking The Right Steps For Tile Installation
Planning to install your tiles by yourself? Make sure that you do it the proper way. Tile Wizards shares this helpful guide on the right steps before, during, and after tile installation…READ MORE


